Kurinuki Volcano: How to carve a smoking incense burner
This is the third instalment of my kurinuki pottery series and in this tutorial, I’ll be showing you how to carve an incense burner shaped like a volcano. I love smoke domes or incense burners, they’re a great addition to the home and provide a cosy and relaxing vibe. These incense burners are for the small cone-shaped incense, rather than the long sticks. You can view my other kurinuki tutorials on making a yunomi or gaiwan. Kurinuki is the Japanese method of carving pots from a lump of clay and is a great technique for those potters wanting to learn new ways of hand-building with clay. I’ve made an illustrated handout with instructions that you can download at the end of the post for quick reference.
Preparing and Shaping Clay for Kurinuki
Before you start, ensure the clay is wedged and firm for carving (similar to modelling clay), you can refer to my post on reclaiming and preparing clay for more information. Kurinuki is all about carving from a single block of clay and we can make this process easier by moulding the clay into a similar shape to what we want our final piece to be. For these volcano incense burners, you can shape the clay into a dome shape. I find it easier to wedge and shape the clay while it’s on the softer side and then leave it to dry a little and firm up before I come to carve it.
Carving the base of the incense burner
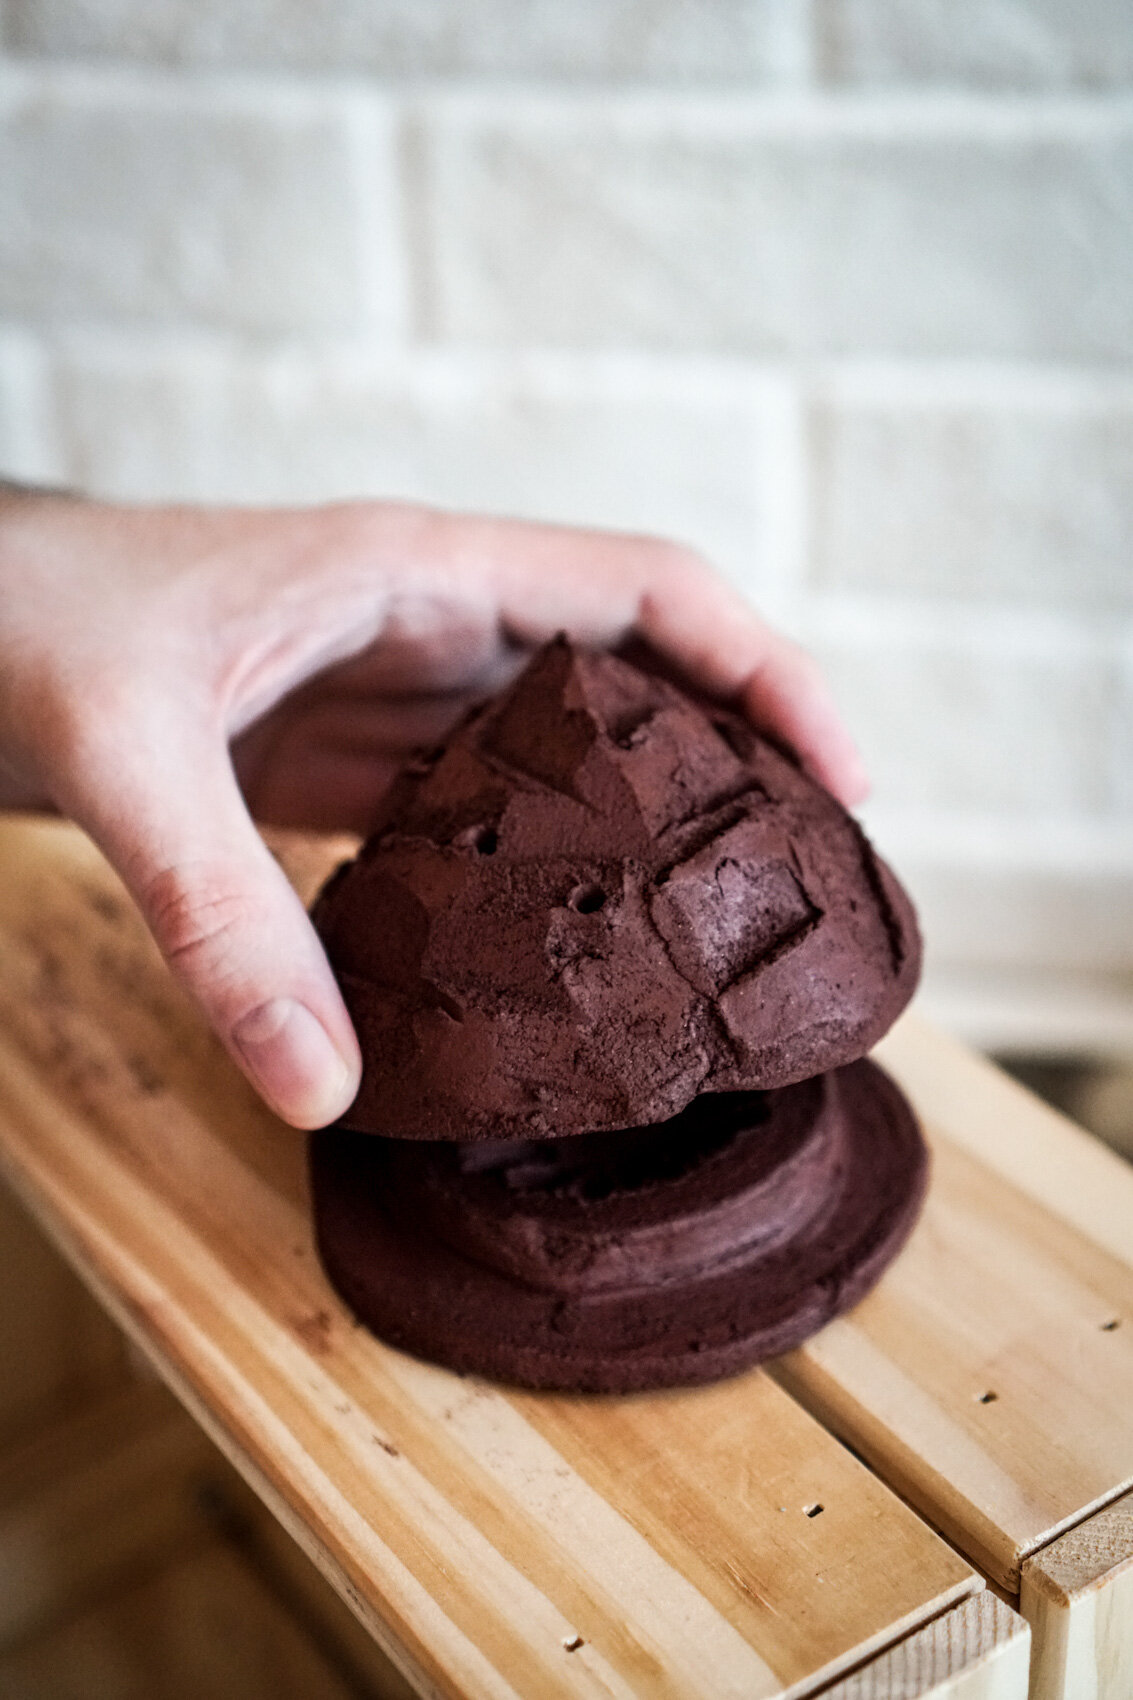
I start by cutting the top off the dome using a wire, leaving a disk of clay that this about 2cm thick to form the base. This is where the cone of incense will sit when it is burning. Using a square loop tool you can carve away the edge of the disk to get it as round as possible. If you don't have a loop tool you can use a knife or spoon. I then use a needle tool to mark a circle in the middle, this is the platform where the incense cone will sit. I then remove clay from the outside of this circle so that the platform is raised. Flip the base over to remove clay from the bottom, as the base is quite thick it’s important to thin it out. I then carve a small indent in the platform which is where the incense cone will sit. This is an optional step, it’s perfectly fine to leave the platform flat if you don't want to risk making a hole in the base.
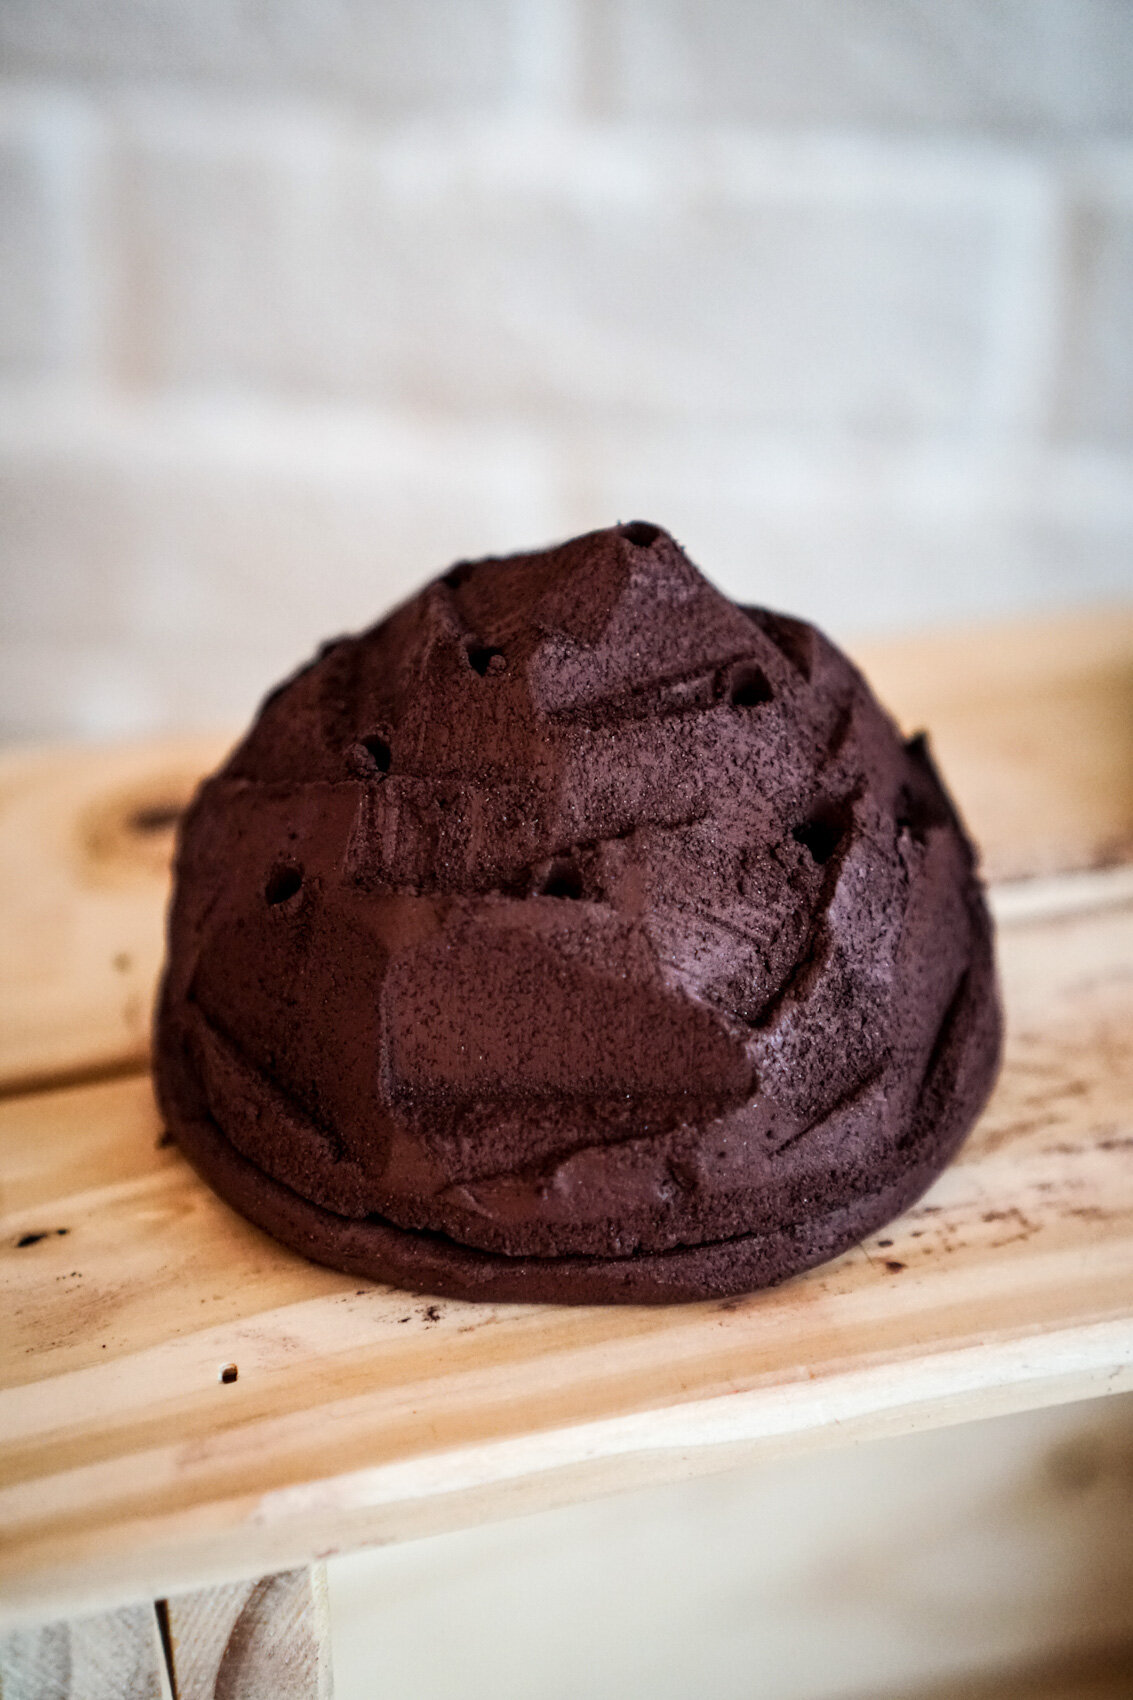
Carving the lid of the incense burner into a volcano shape
Hollow out the dome that was cut off at the beginning by removing clay from the inside to give a dome. Place the dome on top of the base to ensure a snug fit. If it doesn't fit properly you can remove more clay from the inside of the dome, but make sure that the walls don’t get too thin, you’re looking to keep them about 2 cm thick. You can also trim the outside of the base so that the dome fits well over the top. Leave the clay to dry and firm up a little (about leather-hard) use a large Polyfilla tool or spatula to make facets to the outside so that the smoke dome resembles a rocky mountain. Then you can make holes so that the mountain becomes a volcano when you burn incense inside and the smoke escapes through the holes. I use a tool to bore holes in the top; if you don't have one of these, you can use a straw (the metal reusable ones are perfect). I also make angular holes in the side using a knife to mimic the rocky facets I made earlier. After making the holes, go back in and carve more rocky facets until you are happy with the look of your volcano. You can test out your hole placements by burning an incense cone inside and checking the smoke escapes nicely before you fire your piece. If you think it needs more, go ahead and carve more in.
I hope you found this helpful, and I would love to hear about your pottery journey - come and find me on Instagram @blankearth. I will be posting more pottery tutorial videos on my YouTube channel Blank Earth Ceramics. You can view my work in the gallery and my shop - the shop gets updated with new pots a few times a year so please sign up to my mailing list if you want to get early access and be notified when the shop opens.
Happy Pottering!
Supatra x

Download a quick-reference how-to guide on carving a kurinuki volcano ‘incense burner’.