Kurinuki incense cottage: How to carve a botanical ceramic house
You folks seem to really love these cute little cottages I make using the kurinuki technique of carving away clay. In this tutorial, I’ll show you how to make one of my botanical cottages that can be used as a lantern or for incense cones. I love making these pottery houses using the kurinuki method because it gives each one its own personality - unique in its own way! If you’re new to kurinuki I would suggest practising by following some of my tutorials that are aimed at beginners such as making a yunomi or gaiwan.
Watch the video below where I take you through each of the steps to make your very own kurinuki cottage!
PREPARING AND SHAPING CLAY FOR KURINUKI
Before you start, ensure the clay is well wedged so there aren’t any air bubbles in the clay, you can refer to my post on reclaiming and preparing clay for more information. You can make any size of house you like but for my cottages, I start with 3 kg of clay that I shape into a 3d rectangle. I shape it by using the weight of the clay to smack down onto the table surface so that the edges square out. I do this over and over again until I’m happy with the shape. I then use a wooden paddle to shape the roof by tapping the top edges so they flatten and make a sloping roof that will form the lid. I then let the clay dry out so that it firms up a little before I do the initial hollowing out of the clay. You’re looking for the clay to still be soft but not so soft that it sticks to your tools easily.
Adding botanical decorations
After the clay has firmed up a little I cut the roof off as straight as possible using a wire tool. I set the roof aside and shape the house part again by smacking it on the table similar to the initial shaping of the clay. I do this so that the cross-section of the top becomes smaller and the roof will sit on the top with an overhang. I place the roof back on top to make sure I’m happy with how much the roof is overhanging before I go onto the next step. This is the fun bit where I rummage through all the bits I have collected from my garden and on walks throughout the year and pick out pieces of foraged foliage and botanicals to press into the surface of the clay. I think seed pods work the best as they aren’t too delicate so can be pressed into the clay over and over again without breaking. I usually decorate what will become the front and back of the cottage and try to place the botanicals around where I’m planning to cut out the windows and doors. But there are no rules and I recommend that you really experiment at this step and add your own personal twist to the design.

Hollowing out the cottage
I start by hollowing out the house using a square-ended loop to carve out strips from the inside of the box leaving about 0.5cm in the walls and base of the house. You can test the thickness of the walls by poking a needle into the walls and marking how deep it goes. After removing the clay from the inside of the house I use the same tool to smooth out the inside of the walls and clean up the carving marks as much as possible.
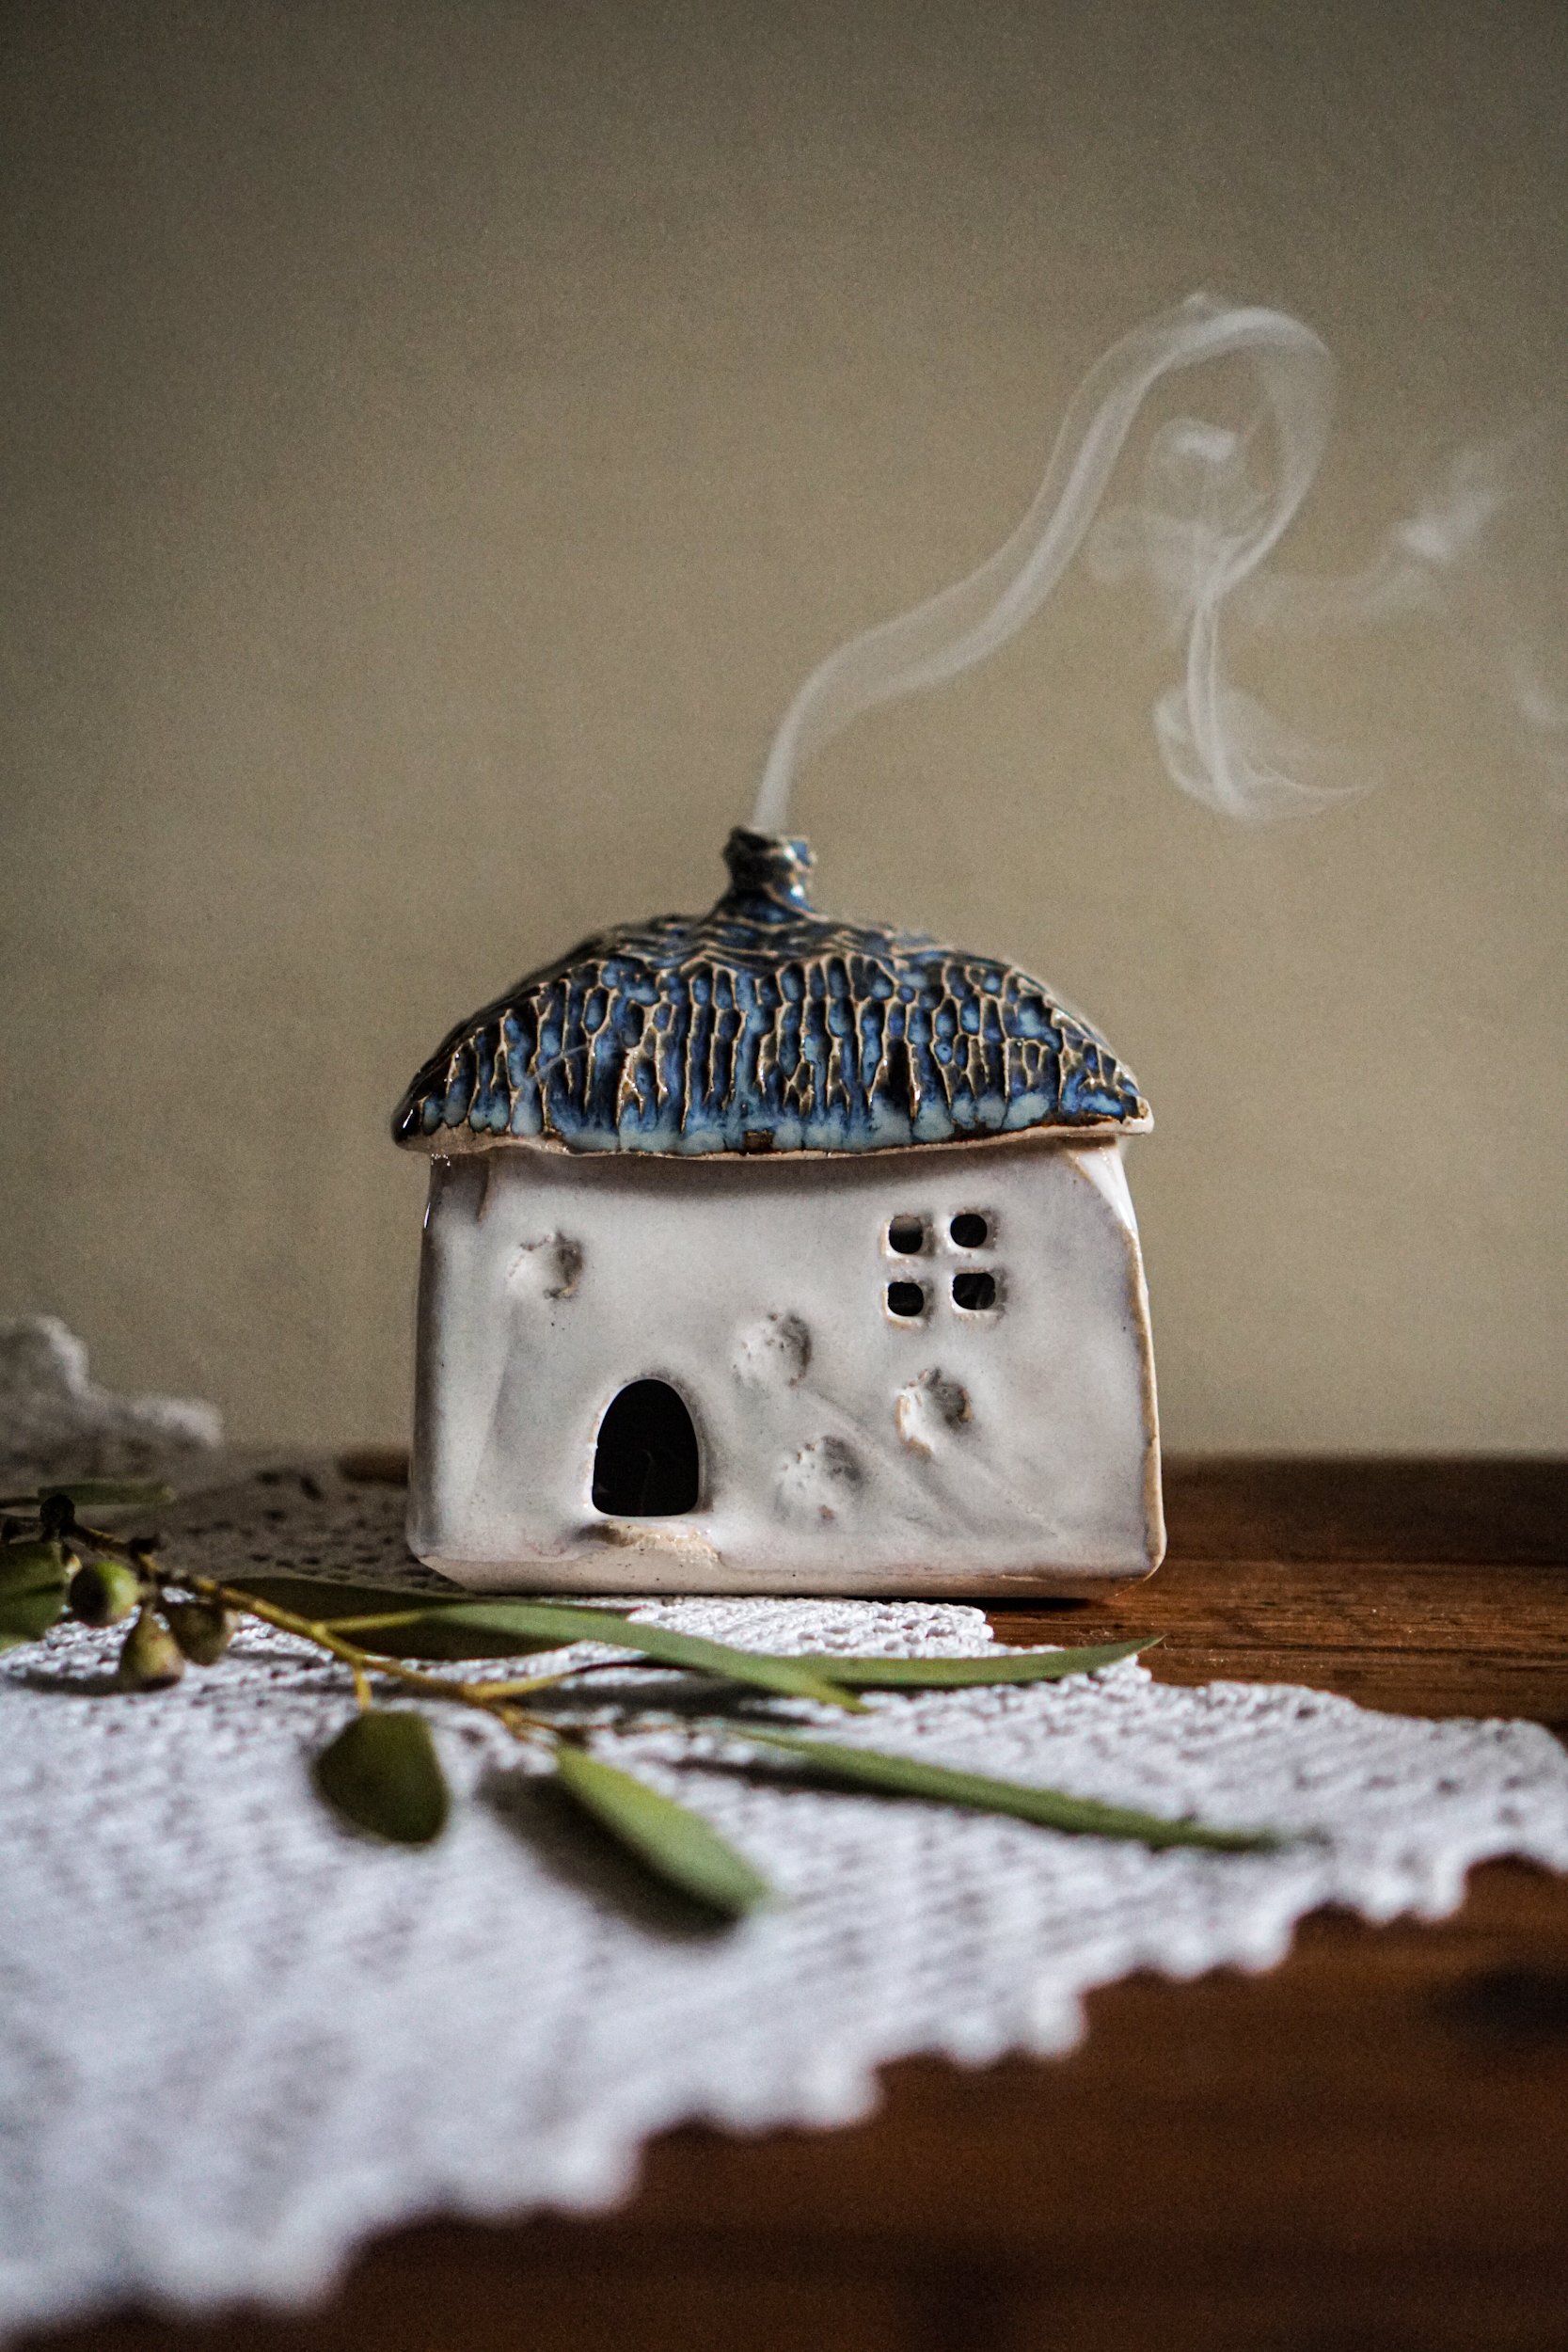
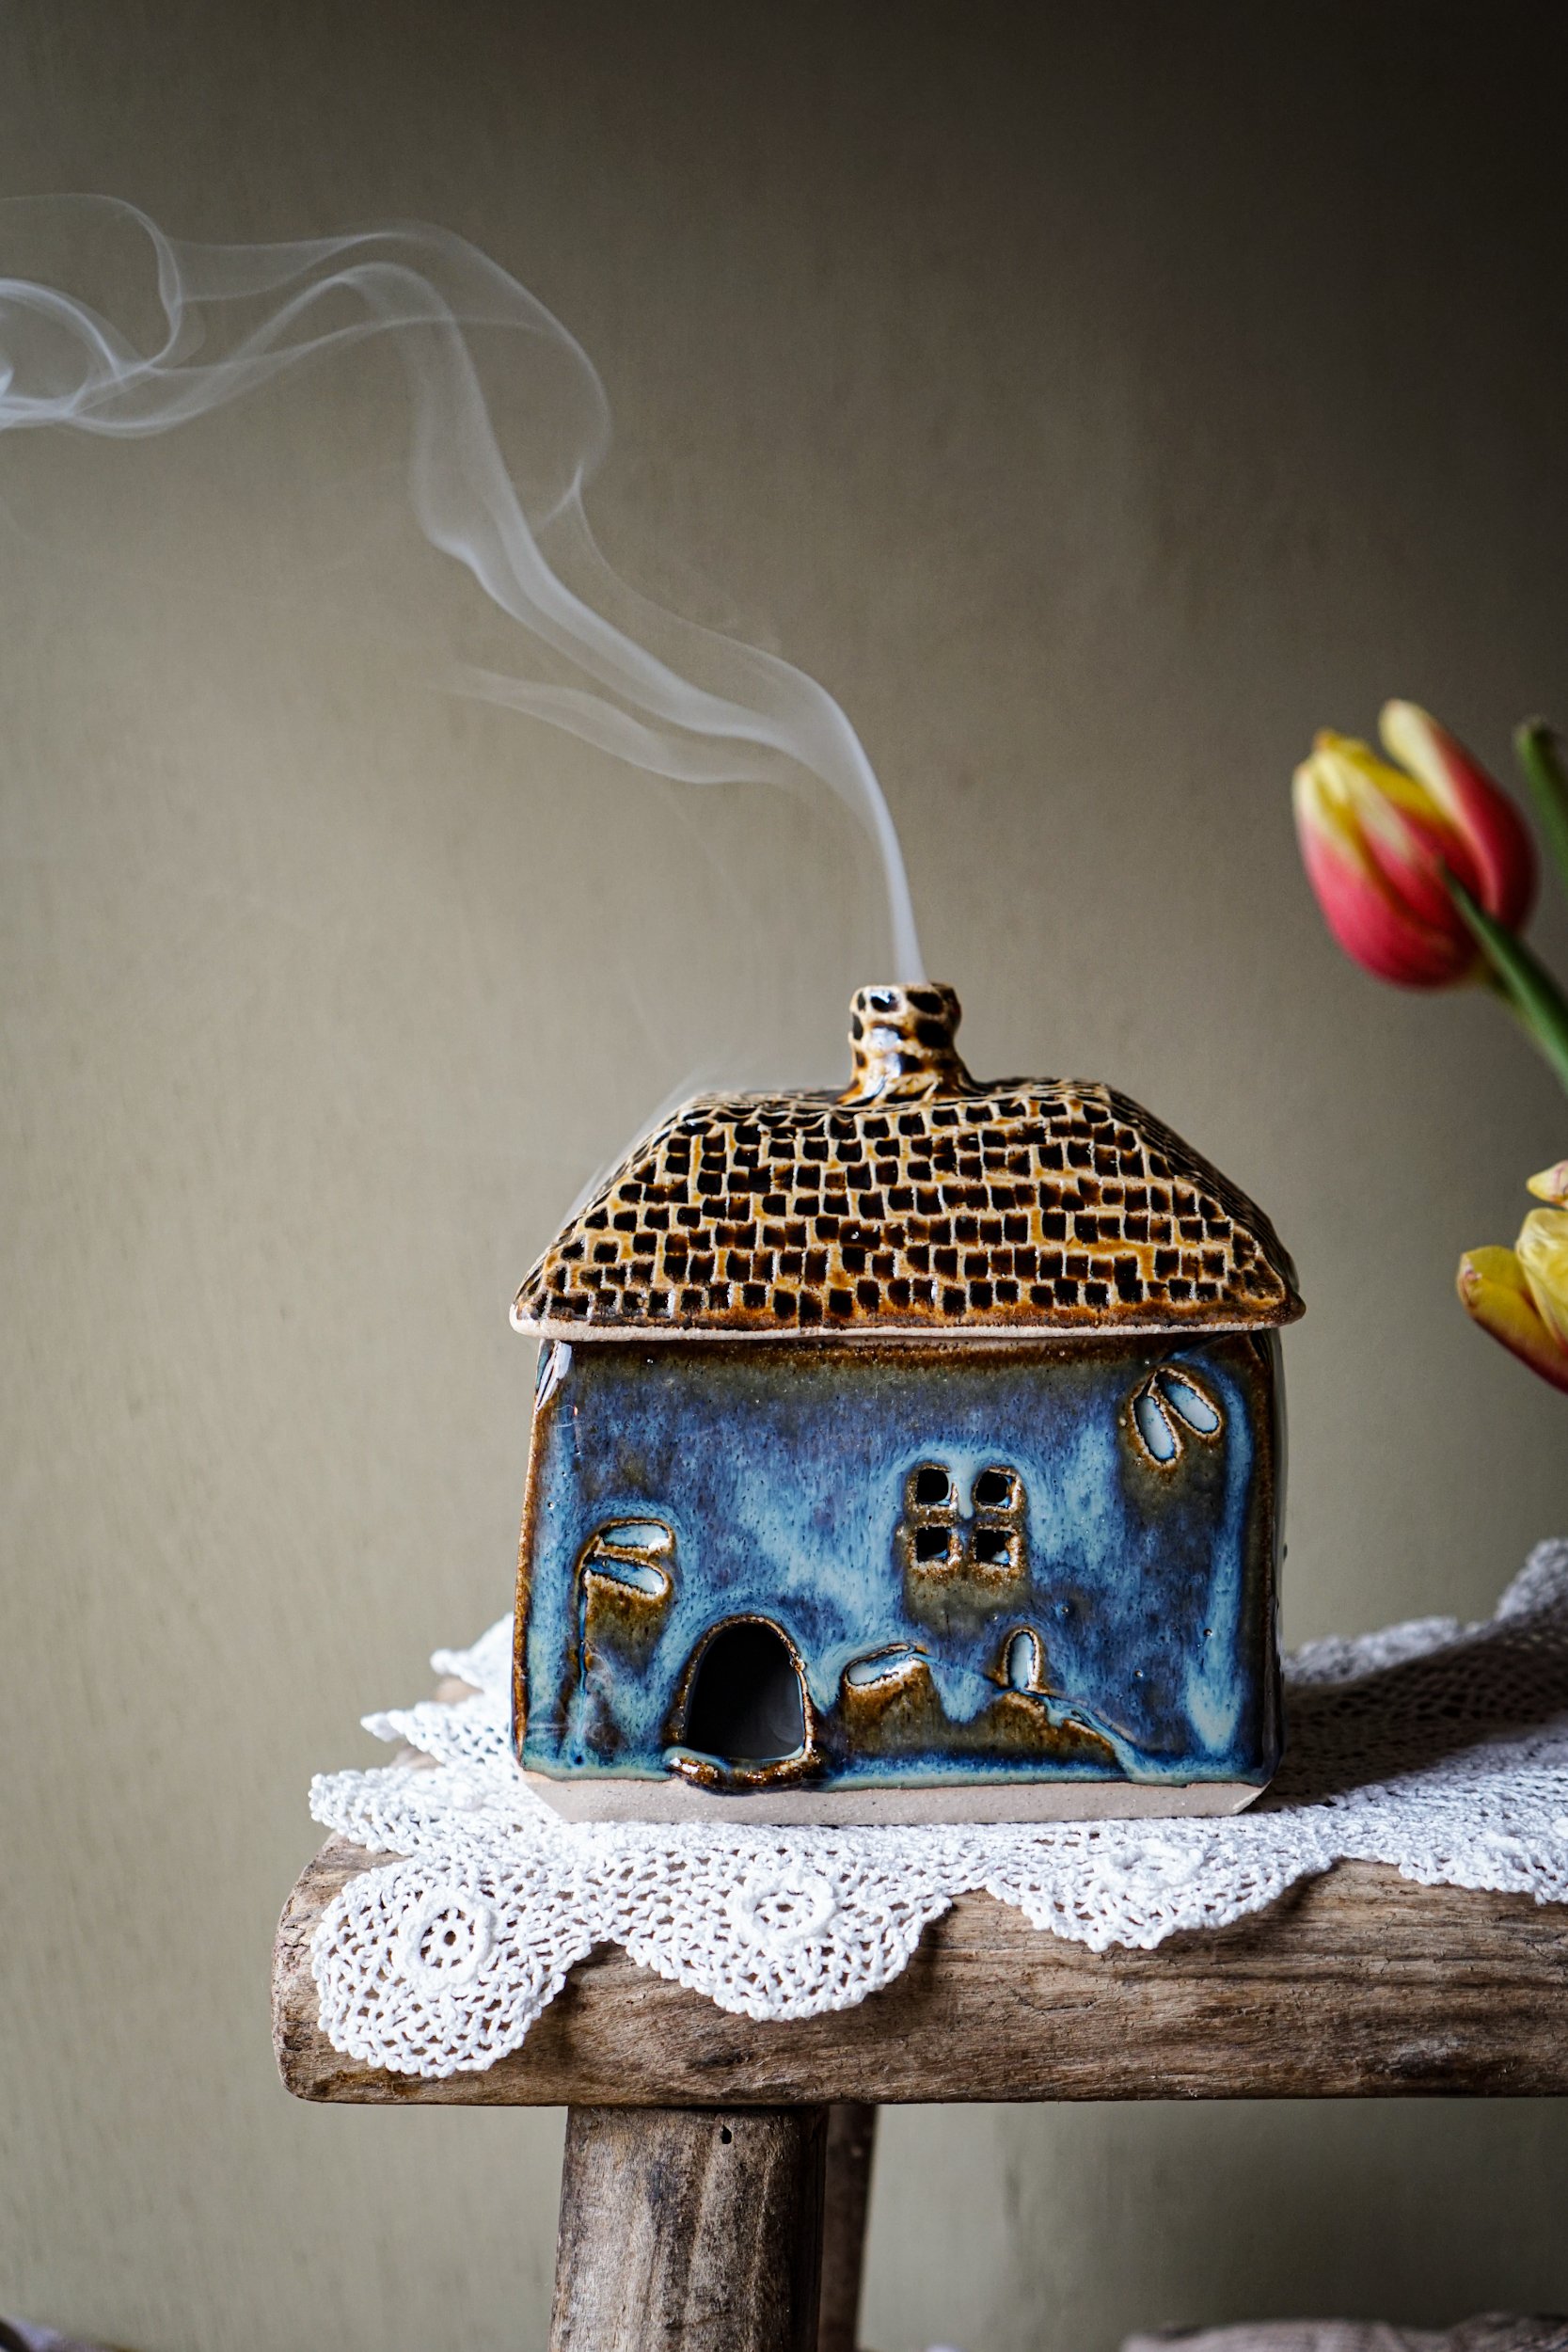
To hollow out the roof I use an angled loop tool that has a 45-degree angle to it so that it follows the slope of the roof and makes it easier to remove clay from the underneath. Again I leave the thickness of the walls about 0.5 cm. I added a small cylinder of clay to form the chimney using slip (liquid clay) then smoothing over the join so that it’s well attached. A hole is made in the middle of the chimney all the way through the top of the roof using a wooden tool similar to a pencil. When you’re doing this make sure you brace the underneath of the roof with your hand so that it doesn’t distort too much with the pressure. I then set the roof on top of the walls of the house to let it dry out to around leather hard - you’re looking for it to be firm enough so that it doesn’t easily distort but still soft enough that you can put your fingernail in and leave a mark which is perfect for the next step of carving.
Carving the cottage
Once the cottage has firmed up to about leather hard I used a tear-drop shaped loop tool to carve and smooth out the underneath of the house. I also use a DIY Polyfilla knife to add a bevelled edge to the base which makes the cottage look nice and neat but also removes some of the excess clay so your piece feels lighter. I also run over the inside of the walls smoothing out any lumps and bumps from the initial hollowing out so that they look and feel smoother. I then use a small pointy scalpel to cut out the windows and doors and finish it off by smoothing over the inside with a damp sponge. I’ve not shown it in this video but you can add a little doorstep by attaching a little sausage of soft clay to the bottom of the door. I just stick it on and smooth it out with a sponge.
For the roof, I carve the tiles using a p2 U tip diamond-core tool on the outside and then remove the excess clay underneath using a loop tool so that the roof feels light. To make the roof fit snuggly to the house I use a damp sponge to smooth over the underneath of the roof and the edges so that the clay softens a little. This allows me to mould the edges of the roof to fit over the walls of the house so it’s a nice fit. This part is delicate and you have to be careful not the break the clay so take it slow and steady!
Finishing touches to your pottery cottage
I leave the cottage to dry out completely so that it’s bone dry before going into a bisque firing in the kiln, I then glaze it and put it in for a glaze firing after which it’s ready to use! You can use these ceramic cottages as a trinket box for your treasures, a lantern or for burning incense cones. Wait till the end of the video to see incense smoke escaping from the chimney!
I hope you found this helpful, and I would love to hear about your pottery journey - come and find me on Instagram @blankearth. I will be posting more pottery tutorial videos on my YouTube channel Blank Earth Ceramics. You can view my work in the gallery and my shop gets updated with new pots a few times a year so please sign up to my mailing list if you want to be notified when the next shop opening is.
Happy Pottering!
