Kurinuki Gaiwan: How to make a lidded tea bowl by carving clay
This is the second instalment of my kurinuki pottery series and is all about carving a gaiwan from a lump of clay. Have a look at my previous post on how to make a kurinuki yunomi. A gaiwan is a traditional Chinese lidded tea bowl used for brewing and drinking tea from the same vessel. Kurinuki is the Japanese method of carving pots from a lump of clay and is a great technique for those potters wanting to learn new ways of hand-building with clay. I have made an illustrated handout with instructions that you can download at the end of the post for quick reference.
Preparing and Shaping Clay for Kurinuki
Before you start, ensure the clay is wedged and firm for carving (similar to modelling clay), you can refer to my post on reclaiming and preparing clay for more information. Kurinuki is all about carving from a single block of clay and we can make this process easier by moulding the clay into a similar shape to what we want our final piece to be. I find it easier to wedge and shape the clay while it’s on the softer side and then leave it to dry a little and firm up before I come to carve it.
Cutting out the gaiwan lid and carving the general shape
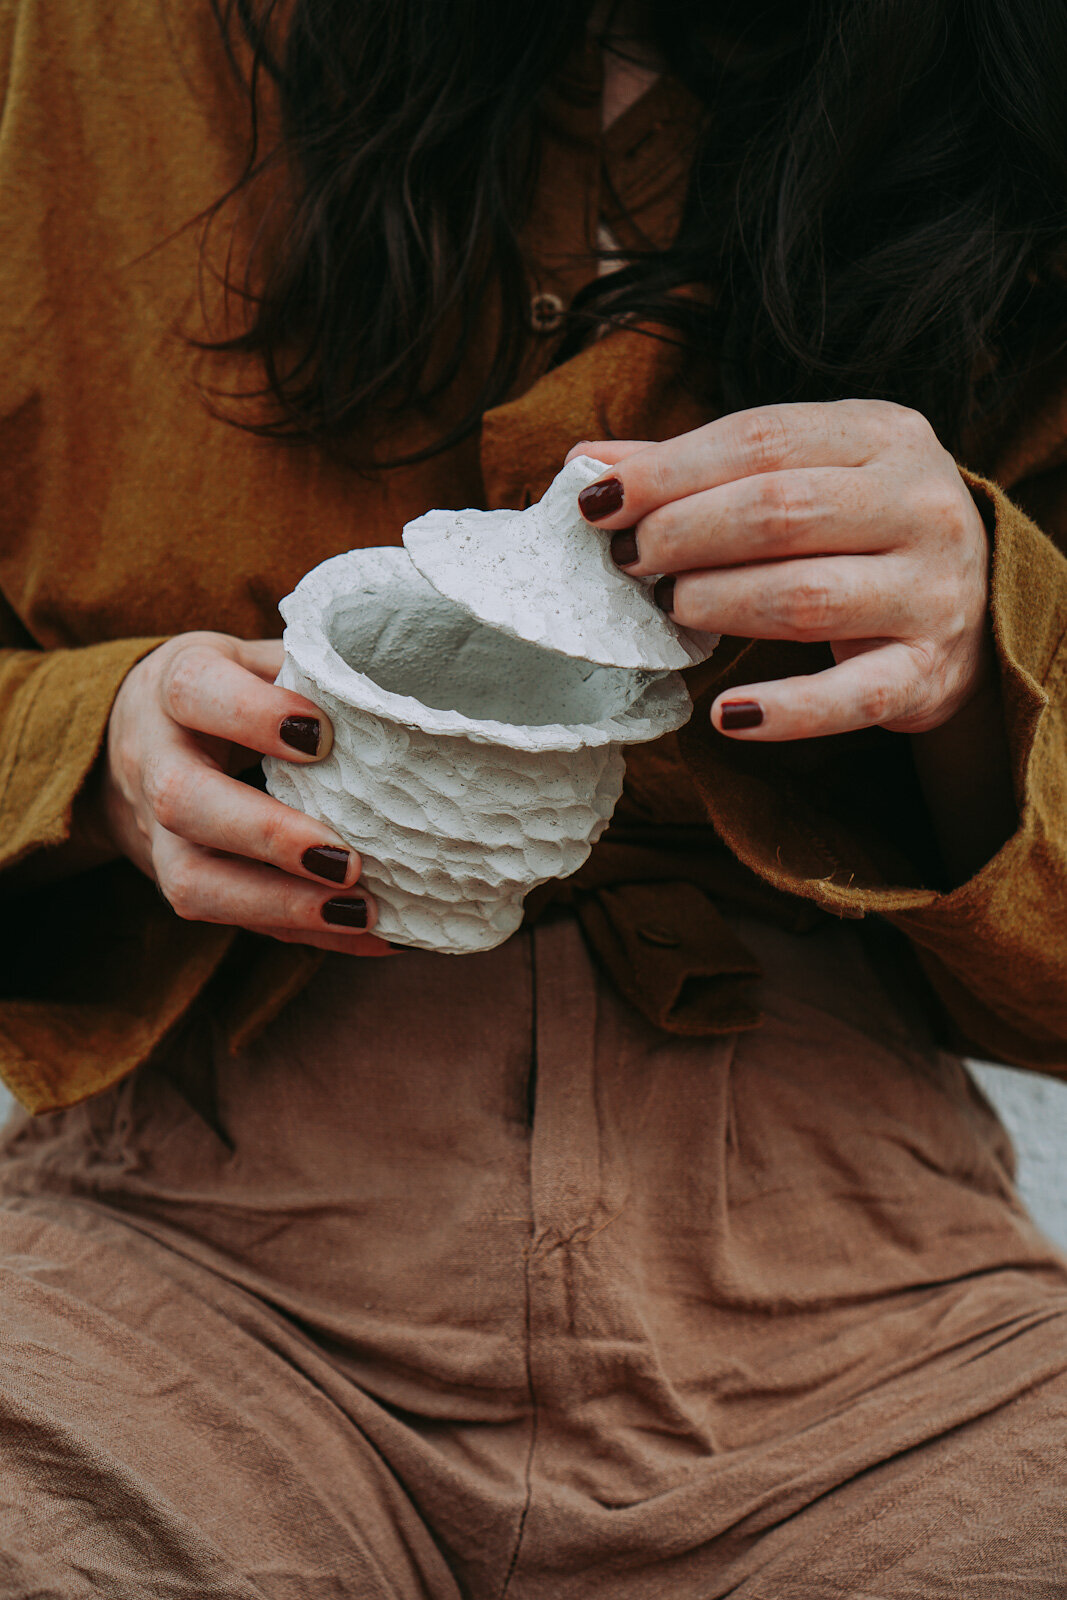
I start by using a knife to cut out a cone from the top of the lump of clay that will form the lid. The point of the cone is shaped into the knob/handle and the large flat part of the cone will be the bottom of the lid. I shape the lid by carving using a loop tool and I also use my hand to mould the clay. Gaiwan lids traditionally have a hollowed knob on the top that helps for holding the lid in place while pouring the tea or drinking from the bowl. Hollow out the knob using a loop tool then shape with your finger, ensuring you have a nice round fit. I then roughly shape the outside and hollow out clay from the underside. This doesn’t have to be too precise as I’ll do the final shaping when the lid is on the tea bowl to ensure they fit together well.
Carving the gaiwan tea bowl shape
Place your lump of clay on a banding wheel; if you don't have one of these you can just use a piece of cardboard to help you move the clay around. First, carve the inside to hollow the clay out. For this, I use a large loop tool, if you don't have one of these you can use items you find around the house e.g. a spoon. Keep the walls fairly thick at this point because we’ll be carving the outside as well, about 1.5-2 cm thickness is good for now. Also, it's important to leave enough clay in the base, about 1.5-2 cm. You can measure the base thickness by using a ruler or stick to measure the inside length and subtract from the outside length to give the base thickness.
Gaiwan have a very traditional simple shape, please see this guide to gaiwan for more information. The lip of the gaiwan fans out, which I shaped by moulding the clay with my hands. I then gradually carved the outside of the tea bowl using a loop tool to follow the traditional gaiwan shape. This takes time and lots of standing back and assessing the shape to get the profile right. Once I was happy with the general tea bowl shape I placed the lid on top to ensure it fits nicely. I ensured the fit was snug by carving the lid and tea bowl together, by doing this the carving you do extends from the lid to the tea bowl so that they fit together. Leave your gaiwan to dry out so that it firms up a little before carving the rest, you are looking for it to be a little firmer than leather-hard. The clay should still be easy to carve but not too soft that you can distort the shape easily.
Decorative carving to add the finishing touches to your gaiwan
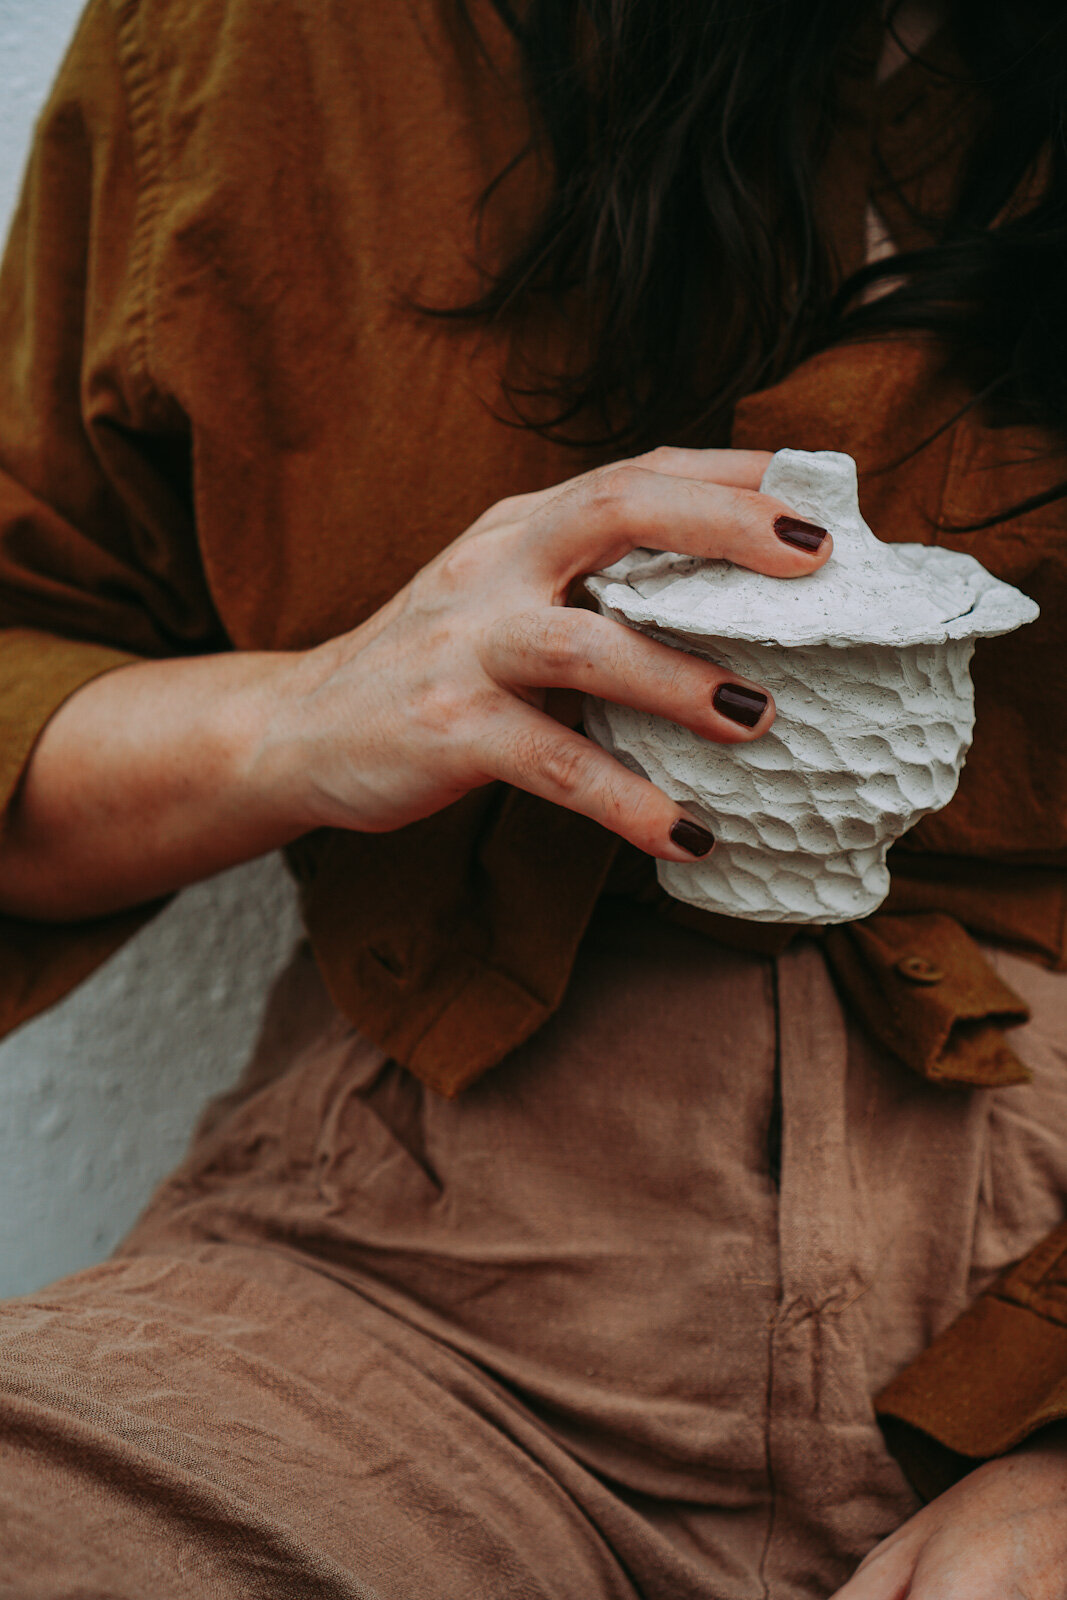
Now comes the fun part, making decorative patterns by carving, these will be visible on the finished gaiwan so it’s important to be more thoughtful in the placement of these. During this final carving, aim to reduce the weight of the yunomi by trimming the walls just enough so that they are thin but still strong. You can do this by carving the outside or inside, if you have a nice pattern on the outside but your gaiwan is still heavy you can remove clay from the inside of the gaiwan to reduce the weight.
Experiment with different types of tools to give varying textures and effects, for my kurinuki gaiwan I used a small loop tool to dig out small grooves and followed the shape of the tea bowl. I thought this complemented the round shape of the gaiwan, reminding me of an exotic fruit. I carved the foot of the bowl using this pattern as well. I also concentrated on carving these grooves at the join of the lid and tea bowl so that the piece flowed as one, this also helps your lid to fit to the bowl better. I finally used my potter's stamp on the lid and bowl to mark the place where the lid fits to the bowl, if you don't have a stamp you can just draw a line. This is important because of the irregular and handmade nature of kurinuki the bowl is not a perfect circle and the lid only fits the bowl in one orientation. Finally, sponge your piece to smooth out any areas and compress the edges.
I hope you found this helpful, and I would love to hear about your pottery journey - come and find me on Instagram @blankearth. I will be posting more pottery tutorial videos on my YouTube channel Blank Earth Ceramics. You can view my work in the gallery and my shop - the shop gets updated with new pots a few times a year so please sign up to my mailing list if you want to get early access and be notified when the shop opens.
Happy Pottering!
Supatra x

Download a quick-reference how-to guide on carving a kurinuki gaiwan ‘lidded tea bowl’